
Do you cover a pot pie when baking? That’s a question every home cook has pondered at some point. Whether you’re aiming for a perfectly crispy crust or a moist, flavorful filling, the way you bake your pot pie can make all the difference. Some swear by covering it to prevent over-browning, while others believe baking it uncovered yields the best results. In this guide, we’ll explore everything you need to know about baking pot pies—when to cover them, when to leave them exposed, and how to achieve the ideal texture and taste.
Introduction
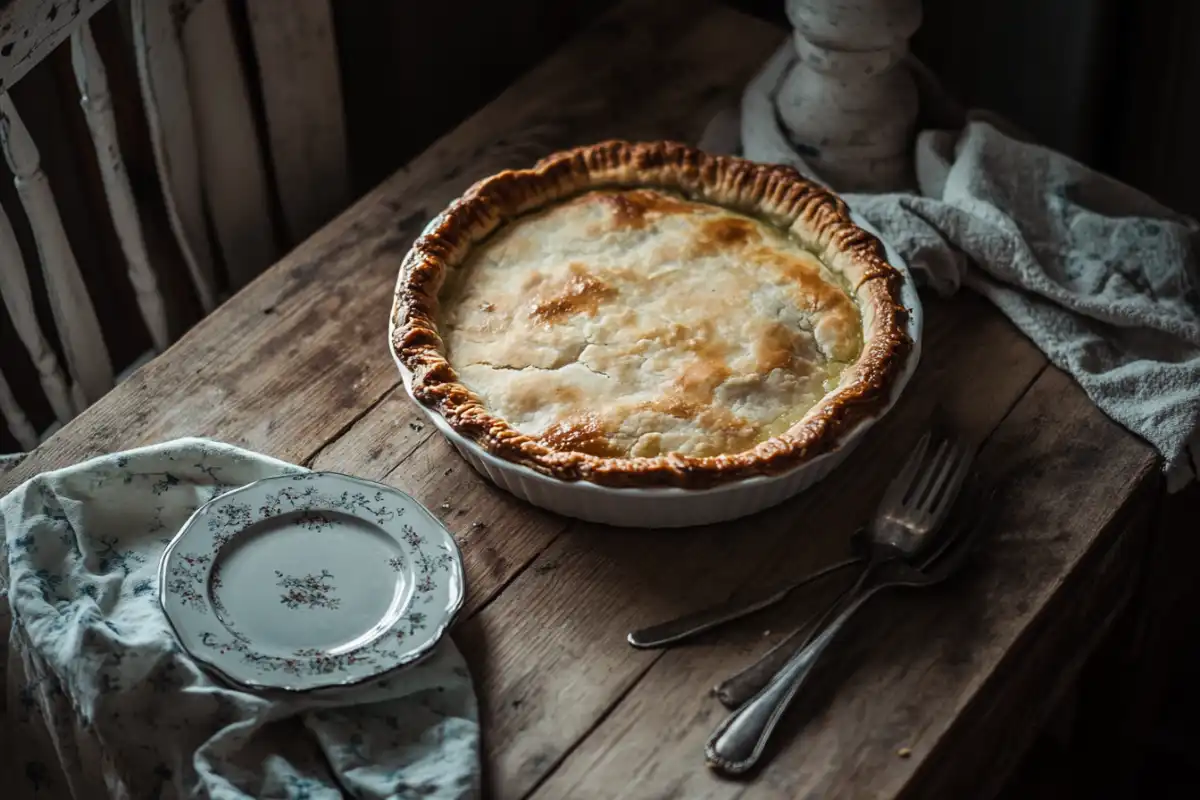
Introduction to Baking Pot Pies
Pot pies have been a staple comfort food for generations. Whether filled with chicken, vegetables, or a rich, savory gravy, they bring warmth to the table and a sense of nostalgia. However, baking them just right can be a tricky affair. Many home cooks wonder—should you cover a pot pie when baking? Well, it depends on several factors, including your recipe, oven settings, and desired crust texture.
Baking techniques can make or break your pot pie. Covering the pie may keep the filling moist and prevent the crust from burning, but it might also make it too soft. On the other hand, leaving it uncovered ensures a golden-brown, flaky crust but runs the risk of drying out the filling.
Understanding the dynamics of baking a pot pie will help you achieve the perfect balance of crispness and juiciness. So, should you cover it or not? Let’s dive into the specifics.
Importance of Proper Baking Techniques
Mastering the art of baking a pot pie isn’t just about throwing it in the oven and hoping for the best. Proper baking techniques ensure that the pie bakes evenly, the crust stays crisp, and the filling is cooked to perfection.
Several key elements contribute to a well-baked pot pie:
- Oven Temperature: Baking at the right temperature ensures the filling doesn’t overcook while the crust gets just the right crispness.
- Crust Protection: Whether you cover your pot pie or not, keeping the crust from burning requires the right approach, such as using foil or pie shields.
- Moisture Control: Too much steam buildup can make the crust soggy, while too little can dry out the filling.
Cooking your pot pie with precision can elevate its taste and texture to restaurant-quality standards. Understanding these techniques allows you to customize your baking process based on personal preferences and the ingredients used.
Understanding Pot Pie Components
When making a delicious pot pie, many home cooks ask, “do you cover a pot pie when baking?” The answer often depends on the balance of key components—crust, filling, and seasonings. Each element contributes to the overall success of the dish, whether baked covered or uncovered.
The foundation of a well-made pot pie consists of:
- Crust: The golden, flaky pastry encasing the filling, providing both structure and texture. Many people wonder whether covering a pot pie when baking can affect the crispness of the crust.
- Filling: The heart of the pie, filled with tender meats, vegetables, and creamy sauce. A covered pie helps retain the moisture in the filling.
- Seasonings and Flavors: Spices and herbs elevate the dish, adding depth and aroma. Whether you’re baking your pot pie covered or uncovered, seasoning is crucial for flavor balance.
Achieving the right harmony between these elements ensures a pot pie that’s flavorful, rich, and satisfying. However, one common concern is that too much filling can overwhelm the crust, while insufficient seasoning can leave it bland. So, should you cover a pot pie when baking to lock in flavors, or let it bake uncovered for a golden crust? Let’s explore further.
The Role of the Crust
One of the biggest dilemmas when baking is deciding, “do you cover a pot pie when baking to protect the crust?” The crust is the defining feature of a pot pie, offering a crisp, buttery contrast to the rich, creamy filling inside. However, whether you bake it covered or uncovered can significantly impact the texture and success of the dish.
Structure and Texture
A well-made crust should be crisp on the outside yet tender enough to cut easily. Achieving this delicate balance requires knowing when to cover your pot pie during baking to prevent over-browning.
Bottom vs. Top Crust Differences
Some pot pies have only a top crust, while others feature both a bottom and top crust. Baking a pot pie covered can help prevent the bottom crust from getting soggy, whereas baking it uncovered ensures a crisp, golden finish.
Choosing the right method—covering or uncovering—depends on your preference for crust texture and your baking method.
The Importance of the Filling
Another important aspect when considering whether to cover a pot pie when baking is the filling. A pot pie’s filling should be rich, hearty, and bursting with flavor, but achieving the perfect consistency takes careful attention to detail.
Consistency and Moisture Levels
A perfectly cooked filling should be creamy enough to coat a spoon but not too runny to make the crust soggy. Covering your pot pie while baking helps retain moisture, while leaving it uncovered allows excess liquid to evaporate, concentrating flavors.
Common Ingredients Used
Traditional pot pie fillings include shredded chicken, peas, carrots, and a luscious béchamel sauce. However, creative variations feature mushrooms, seafood, or plant-based alternatives. Regardless of the ingredients, how you bake the pie—covered or uncovered—affects the texture and taste of the filling. pie can bubble over, while too little filling may lead to a disappointing experience.
To Cover or Not to Cover?
Should You Cover a Pot Pie When Baking?
The age-old question—do you cover a pot pie when baking?—has sparked many debates among home cooks and professional chefs alike. The answer isn’t as simple as “yes” or “no”; it depends on the type of pie you’re baking and your desired outcome.
Understanding the Purpose of Covering:
Covering a pot pie during baking serves a few important purposes. It helps trap moisture, ensuring the filling stays juicy while preventing the crust from browning too quickly. This method is particularly useful when baking pies with longer cooking times.
Factors Influencing the Choice:
Several factors come into play when deciding whether to cover a pot pie, such as:
- The type of crust—thin or thick.
- The oven temperature and baking duration.
- Your preference for a soft vs. crispy crust.
Benefits of Covering a Pot Pie During Baking
Covering a pot pie offers several advantages that can enhance the final dish. While some people prefer an uncovered pie for a crispier texture, covering can be beneficial in various ways.
Preventing Over-Browning:
A common problem when baking pot pies is the crust browning too quickly, leaving the filling undercooked. Covering the pie with foil or a lid allows for more even cooking and helps avoid burning the top.
Retaining Moisture:
When a pot pie is covered, steam is trapped inside, keeping the filling from drying out. This results in a juicier, more flavorful interior without compromising the texture of the ingredients.
Even Heat Distribution:
A covered pot pie ensures that heat is evenly distributed across the entire dish. This is especially important for larger pies that require longer cooking times, preventing hot spots and ensuring thorough baking.
If you’re baking a frozen pot pie, covering it for the majority of the cooking time can prevent a soggy crust while allowing the filling to heat properly.
Advantages of Baking a Pot Pie Uncovered
On the flip side, leaving your pot pie uncovered can also produce some delicious results. Many people love the crispy, golden crust that develops when the pie is exposed to direct heat in the oven.
Achieving a Crispy, Golden Crust:
Baking a pot pie uncovered allows the crust to become beautifully crisp and golden brown. The direct heat promotes caramelization, enhancing both the flavor and texture.
Allowing Steam to Escape:
An uncovered pie lets excess moisture evaporate, preventing a soggy bottom crust. This is particularly important for pies with a high liquid content in the filling, such as those made with fresh vegetables.
Enhancing Flavor Concentration:
When baked without a cover, the filling can reduce slightly, intensifying its flavors and making each bite more rich and satisfying. The slight caramelization of ingredients near the crust further boosts the overall taste.
However, keep an eye on the pie—baking it uncovered for too long may result in an overly dry filling or an overly dark crust.
Factors to Consider Before Covering a Pot Pie
Before deciding whether to cover your pot pie while baking, it’s important to weigh a few factors that can influence the outcome.
Type of Crust Used:
A thicker, homemade crust may take longer to cook fully, which might benefit from covering during part of the baking process. Pre-made or thinner crusts, on the other hand, might not need covering at all.
Oven Temperature and Baking Time:
High oven temperatures can brown the crust too quickly, requiring some covering to slow the process down. Conversely, lower temperatures allow for more gradual browning without the need for covering.
Personal Preference and Recipe Instructions:
Ultimately, your baking preference and the recipe you’re following play a significant role. Some recipes call for covering for the first half of the bake and uncovering later for a golden finish, while others may suggest keeping it uncovered the entire time.
By considering these elements, you can tailor your approach to achieve the perfect pot pie—whether you crave a soft, tender crust or a crispy, golden finish.

Step-by-Step Baking Guide
How to Bake a Covered Pot Pie
Baking a covered pot pie is a fantastic way to achieve a moist, tender filling while preventing the crust from over-browning too soon. Whether you’re preparing a homemade dish or baking a store-bought version, following the right steps ensures an evenly cooked, delicious pie.
Preparing the Pot Pie for Baking
Before you slide your pot pie into the oven, it’s crucial to prepare it properly. Here’s what you need to do:
- Chill the Pie: A cold pie going into a hot oven results in a flakier crust and better filling consistency.
- Ventilation Matters: Even if covered, make sure to cut a few small slits in the crust to allow steam to escape.
- Crust Shielding: Applying an egg wash before covering enhances color and texture.
Choosing the Right Cover (Foil vs. Lid)
When it comes to covering, you have two options:
- Aluminum Foil: A simple and effective way to prevent burning while allowing some heat circulation.
- Oven-Safe Lid: If your pie dish comes with a lid, it can lock in moisture and provide a consistent bake.
Both options work well, but foil offers more flexibility, allowing partial covering when needed.
Monitoring Temperature and Time
Baking a covered pot pie requires patience and the right temperature. Typically:
- Bake at 375°F (190°C) for 40-50 minutes, covered.
- Remove the cover for the last 10-15 minutes to allow the crust to crisp up.
- Use a thermometer to check the internal temperature, which should reach 165°F (74°C) for safety.
Best Practices for Covering a Pot Pie
When to Cover and When to Uncover
The key to a perfect covered bake is knowing when to remove the cover. Ideally, keep the pie covered for about three-quarters of the baking time, then remove the foil for the last stretch to achieve a golden, flaky crust.
Checking Doneness Without Removing the Cover
It’s tempting to peek, but resist! Instead, use these methods:
- Gently shake the dish—if the filling feels firm, it’s likely done.
- Use an instant-read thermometer to check for a fully cooked filling.
- Look for bubbling along the edges, indicating thorough heating.
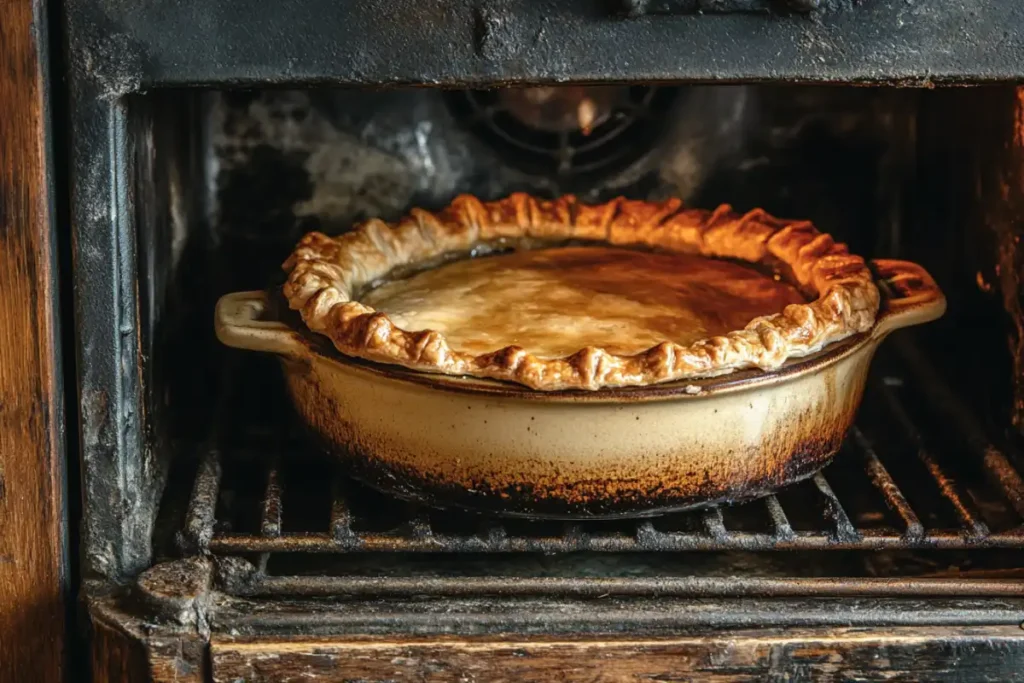
How to Bake an Uncovered Pot Pie
Baking an uncovered pot pie results in a crispy, golden crust with deep flavor, but it requires careful attention to prevent burning and drying out.
Proper Oven Placement
To ensure even baking, always:
- Place the pot pie on the middle rack to balance heat exposure.
- Use a baking sheet underneath to catch potential spills and allow even heat distribution.
- Rotate the pie halfway through baking for uniform browning.
How to Prevent the Crust from Burning
The challenge with baking uncovered is avoiding an overly dark crust before the filling is done. To prevent this:
- Brush the crust with an egg wash mixed with a little milk to promote even browning.
- Use foil strips around the edges if they brown too quickly.
- Lower the oven temperature by 25°F (4°C) if the crust is browning too fast.
Monitoring Filling Consistency
Keeping an eye on the filling is crucial. Look for signs such as:
- Bubbling up through the crust slits—this indicates the pie is thoroughly heated.
- A thick, smooth consistency without visible separation of liquids.
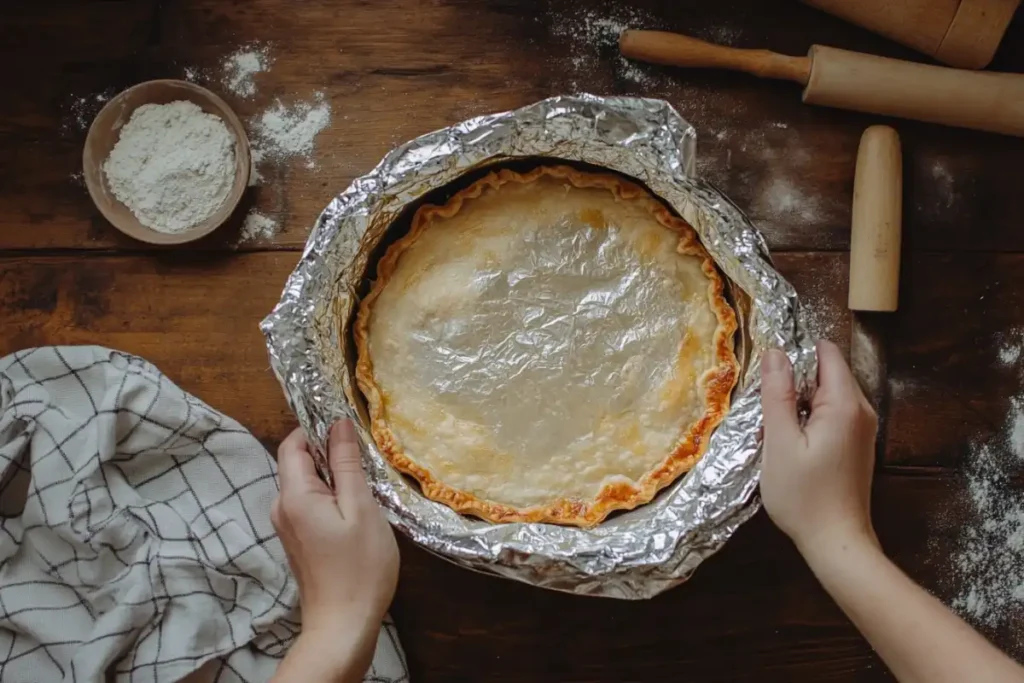
Using Foil to Protect the Crust
Crust protection is essential when baking uncovered to prevent burning while ensuring even cooking.
Partial Covering Methods
If you’re not keen on covering the entire pie, consider these partial covering techniques:
- Crust Shields: Cover just the edges of the pie with strips of foil to avoid over-browning.
- Tent Foil Method: Lightly drape foil over the top without sealing it, allowing airflow.
DIY Pie Crust Shields
Don’t have a store-bought crust shield? Create your own by:
- Cutting a ring from a sheet of aluminum foil to fit over the edges.
- Folding parchment paper into a shield to protect delicate areas.
Baking Times and Temperature Guidelines
Understanding the right baking time and temperature can make or break your pie.
Standard Baking Times for Different Pot Pies
- Fresh homemade pot pie: 375°F (190°C) for 45-55 minutes.
- Frozen store-bought pot pie: 400°F (204°C) for 60-75 minutes.
- Mini pot pies: 375°F (190°C) for 25-35 minutes.
Adjusting for Frozen vs. Fresh Pot Pies
When baking from frozen, add an extra 20-30 minutes to your baking time. For best results, allow frozen pies to thaw slightly in the fridge before baking.
Troubleshooting Common Pot Pie Problems
Preventing Soggy Bottom Crusts
A soggy crust is one of the most frustrating pot pie problems. Fortunately, there are several ways to avoid it.
Pre-Baking Tips
- Blind bake the bottom crust for 10 minutes before adding the filling.
- Brush the base with an egg wash to create a moisture barrier.
- Use a fork to poke small holes in the bottom crust to allow steam to escape.
Choosing the Right Baking Dish
The type of baking dish you use can impact your crust.
- Glass dishes: Allow you to see the crust browning and adjust baking times accordingly.
- Metal pans: Conduct heat more efficiently, producing a crispier bottom crust.
- Ceramic dishes: Retain heat longer, which can sometimes lead to overcooked fillings.
Achieving a Perfectly Golden Top Crust
A golden-brown top crust is the hallmark of a well-baked pot pie.
Egg Wash vs. Butter Glaze
- Egg Wash: A mix of egg and milk gives a rich, glossy finish and enhances browning.
- Butter Glaze: Melted butter brushed over the crust adds a rich flavor and helps achieve an even golden color.
Ideal Baking Temperatures
To achieve the perfect crust:
- Bake at a high temperature initially (400°F/204°C), then reduce to 375°F/190°C for even baking.
- Use convection settings for more uniform browning.
Ensuring Evenly Cooked Fillings
No one wants a pot pie with undercooked ingredients!
Proper Layering Techniques
To ensure everything cooks evenly:
- Cut vegetables into uniform sizes.
- Layer the filling to allow for even heat distribution.
- Pre-cook denser ingredients like potatoes or chicken before adding them to the pie.
Preventing Undercooked Ingredients
- Check that the filling reaches an internal temperature of 165°F (74°C).
- Stir the filling before adding it to the crust to ensure everything is evenly mixed.
- Avoid overloading the pie with too much filling, which can cause uneven cooking.
Expert Baking Tips and Tricks
Selecting the Right Bakeware
Choosing the right bakeware can significantly impact the outcome of your pot pie. The material of the baking dish affects how the crust bakes, the filling cooks, and even how the pie is served.
Glass vs. Ceramic vs. Metal Pans
Each type of baking dish has its pros and cons:
- Glass Pans:
- Pros: Even heat distribution, allows you to monitor the bottom crust for browning.
- Cons: Slower heat transfer, meaning longer baking times.
- Best for: Ensuring a crispy, evenly cooked bottom crust.
- Ceramic Dishes:
- Pros: Retains heat well, provides an elegant serving option.
- Cons: Can cause uneven cooking if not preheated properly.
- Best for: Rustic presentations and slow, even baking.
- Metal Pans:
- Pros: Heats up quickly, ideal for achieving a crisp bottom crust.
- Cons: Can over-brown the crust if not monitored closely.
- Best for: Quick and efficient baking.
The Impact of Pan Materials on Baking
The material of the bakeware influences:
- How evenly heat is distributed throughout the pie.
- The crust texture—whether it becomes crisp or remains soft.
- The total baking time required for the filling to cook through.
Choosing the right dish can make all the difference in achieving that perfectly golden, flaky crust and well-cooked filling.
Preheating and Oven Positioning
Proper preheating and oven positioning can ensure even cooking and prevent an undercooked filling or burnt crust.
Importance of a Preheated Oven
Starting with a preheated oven is essential because:
- It ensures the pie cooks evenly from the start.
- A sudden heat shock helps the crust develop its texture.
- It allows for better moisture retention in the filling.
Always preheat your oven to the recommended temperature—usually 375°F (190°C)—before placing your pot pie inside.
Positioning for Even Baking
Where you place your pot pie in the oven affects how it bakes. Follow these tips for the best results:
- Middle Rack: Ideal for even heat circulation and balanced crust crisping.
- Lower Rack: Helps prevent a soggy bottom crust but may result in a pale top.
- Upper Rack: Good for browning the top, but watch out for overcooking.
For best results, bake your pot pie on the middle rack with a baking sheet underneath to catch any spills and ensure even heat distribution.
Resting the Pot Pie After Baking
Once your pot pie comes out of the oven, it might be tempting to dig in right away, but patience is key!
How Resting Enhances Flavors
Allowing the pie to rest after baking:
- Lets the filling set, preventing a runny consistency when sliced.
- Allows the crust to crisp up further as it cools slightly.
- Enhances the flavors by giving the ingredients time to meld together.
Recommended Resting Times
For best results, let your pot pie rest for:
- 10-15 minutes for a slightly warm and creamy filling.
- 20-30 minutes if you prefer a firmer consistency.
Cover the pie loosely with foil while resting to keep it warm without trapping excess steam.
Frequently Asked Questions (FAQs)
FAQs About Baking Pot Pies
Baking a pot pie can bring up many questions, especially for first-timers. Here are answers to some of the most frequently asked questions to help you achieve pot pie perfection.
Should I cover my pot pie with aluminum foil?
Covering your pot pie with foil can be beneficial in several scenarios.
When it’s necessary to use foil:
- If your crust is browning too quickly but the filling isn’t fully cooked.
- When baking a frozen pie to prevent uneven cooking.
- If you prefer a softer, more tender crust rather than a crispy one.
To use foil effectively, loosely tent it over the pie to allow for some airflow while still protecting the crust.
What happens if I don’t cover my pot pie?
Baking an uncovered pot pie has its perks, but it also comes with potential risks.
Effects on texture and flavor:
- The crust will turn a deep golden brown and become crisp.
- Too much moisture loss may result in a dry filling.
- Some ingredients, such as tender vegetables, may become too firm if overexposed to heat.
If you want a crispy crust but don’t want to risk over-baking, consider covering it for part of the baking time and removing it later.
How do I prevent my pot pie from overflowing?
Overflowing pot pies can make a mess in the oven and waste precious filling.
Techniques to avoid spillage:
- Vent the Crust: Cut small slits in the top to allow steam to escape gradually.
- Don’t Overfill: Leave some space at the top to prevent bubbling over.
- Use a Baking Sheet: Place your pie on a lined baking sheet to catch any drips.
Avoiding overflow ensures a cleaner oven and a more visually appealing pie.
Can I reheat a pot pie after baking?
Absolutely! Proper reheating can help restore the crispness of the crust while keeping the filling moist.
The best reheating methods:
- Oven Method: Bake at 350°F (175°C) for 20-25 minutes until warmed through.
- Air Fryer: A great option for restoring crust crispiness in 10-15 minutes.
- Microwave: Quick but may result in a soggy crust; reheat in short intervals.
Always cover lightly with foil while reheating to prevent the crust from becoming too dark.
What’s the best way to store leftover pot pie?
Proper storage keeps your pot pie tasting fresh and delicious.
Refrigeration vs. Freezing Options:
- Refrigeration: Store in an airtight container for up to 3-4 days.
- Freezing: Wrap the pie tightly in foil or plastic wrap and store for up to 2-3 months.
When freezing, label the pie with the date to keep track of freshness. Reheat directly from frozen or thaw overnight in the fridge before baking.
Conclusion
Summarizing the Key Points
Baking the perfect pot pie involves a careful balance between covering and uncovering it during the cooking process. Covering the pie helps to retain moisture, prevent over-browning, and ensure even cooking, making it an excellent choice when working with delicate crusts or frozen pies. On the other hand, baking it uncovered results in a golden, crispy crust and allows excess moisture to escape, intensifying the flavors of the filling.
To achieve the best results, consider factors such as oven temperature, type of crust, and personal preference. Whether you’re using foil, a lid, or no cover at all, timing plays a crucial role in ensuring the crust doesn’t burn while the filling cooks to perfection. Choosing the right bakeware, positioning the pie correctly in the oven, and allowing it to rest after baking further contribute to a successful outcome.
Encouragement to Experiment
Don’t be afraid to get creative with your pot pie baking process! Try experimenting with different crust types, fillings, and baking techniques to discover what works best for your taste preferences. Whether it’s using a butter glaze for added richness or trying a ceramic dish for even baking, small tweaks can make a big difference.
Adapting recipes to include unique seasonings, alternative proteins, or even plant-based options can offer exciting variations to the classic comfort dish. The beauty of pot pie lies in its versatility, so enjoy the process and make it your own!
Final Thoughts on Baking the Perfect Pot Pie
Mastering the art of pot pie baking takes a bit of practice, but with the right techniques and a little patience, anyone can achieve a delicious, homemade pie with a flaky crust and a savory filling. Whether you prefer your pie covered for a tender texture or uncovered for a crispy finish, the key lies in finding what suits your preferences and learning from each baking experience.
With careful planning, the right bakeware, and a watchful eye, you’ll soon be serving up the perfect pot pie that brings warmth and comfort to every meal. So go ahead, preheat your oven, and start baking your next mouth-watering pot pie today!